This week did not go as well as I had hoped it would. I posted last Friday that Rhylee was off to a Tae Kwon Do competition on Saturday with Quinn. He was very excited to make a road trip on his birthday with just Daddy and him. Well, a storm hit that afternoon/evening and the competition was cancelled for our team so he didn't get to go. Completely last minute we decided to take the four of us and one of his friends to an indoor amusement park here for the day for a birthday party. Even if it was totally last minute, we all had a great time. I can hardly believe that our little man is ten already. He is growing up so fast.
Monday was a PD day from school so the kids were home from school so of course I didn't get anything done that day. Tuesday I got the house tidy from having the kids home for three days but then I got the math done for the pieces required for the blocks for the next few weeks.
Wednesday I started sewing with the thought that I would get at least two, maybe three or four blocks put together. I was so wrong. I got just Swallow put together. I must have been out of practice since I forgot to trim my HSTs so when I added the triangles, I figured I did the math wrong for the triangles so I took them apart and cut larger triangles. Then I tried to put it all together and when it wouldn't go together properly, I realized what I had forgotten so I took it all apart again, trimmed the HSTs, added the original triangles and put it all together again. *Sigh* With all of that, I only got Swallow put together but I believe that it is important for people to know that, even for more experienced quilters, things don't always go as planned and we all make mistakes. There is a reason we all have stitch rippers and many of us even have more than one. I know that I tried to add a second one just after Christmas but my LQS was out of the type I like so I will keep trying so that I can have one upstairs where I hand piece my EPP and another one downstairs in my quilting room where I machine piece.
So, yesterday I started the morning off with Strawberry Basket. I took the photo of the fabric pieces and did my first step of sewing. I went to take my second photo, only to find out that the camera battery had died so I had to pause for twenty minutes to get some charge into the battery, then finished sewing the block and taking photos. Then I had lunch and charged the battery some more so that I could get to work on Temperance Tree. I got that one partially pieced but Thursday is early dismissal at school and then Tae Kwon Do practice so not too bad. Then we got hit with another massive snow storm so this morning I got to spend an hour shovelling up the mess and then I got Tree finished so that I could at least post instructions for three blocks and here I am! Not the way I planned for the week to go but sometimes that is just the way piecing goes.
With that, I will start by posting the photos I have been sent of finished blocks. This week they are all by Suzanne. So, we have Bowtie:

Friendship:

Friendship Block:

Hovering Birds:

And, last but not least, Sawtooth:

That's all the photos that I have for this week but I love what Suzanne has sent. Even if I had a bad week, I am still excited to get going again. Even when life gets in my way sometimes, I love doing this. Both the Quilt Along and quilting in general. With that, let's get to this week's blocks, even if there are only three. Hopefully next week goes a bit better. Also, I am going to start with the more simplified instructions this week so if there are any problems, please let me know!
With that, the first block this week is Block # 93 - Swallow.
 Cut four 2 1/2" x 2 1/2" yellow squares.
Cut four 2 1/2" x 2 1/2" red squares.
Cut one 3 1/2" x 3 1/2" red square.
Cut one 1 1/4" x 1 1/4" yellow square.
Cut two 1 1/4" x 4" yellow rectangles.
Cut two 2" x 2" yellow squares.
Cut two 2 3/8" x 2 3/8" red square and cut these on the diagonal.

Take the one 2 1/2" x 2 1/2" yellow square and place it RST with one 2 1/2" x 2 1/2" red square and stitch it together to make HSTs. Repeat for the other three red/yellow pairs of the same size. After my mistakes, don't forget to trim your HSTs to 2" x 2" square!
Organize your pieces the way they should look.


Place the short side of the red triangle RST with yellow side of the HST, sew a 1/4" seam, set the seam and press to one side. Next place a red triangle RST with one yellow rectangle and sew a 1/4" seam, set the seam and press to one side. Then place the small yellow square RST with the remaining yellow rectangle and sew a 1/4" seam, set the seam and press to one side.

Now place the long yellow rectangle RST with the yellow rectangle/red triangle combination, sew a 1/4" seam, set the seam and press to one side. Sew the pieces of the block together so that they look like the picture to the left.
Lastly, flip the red/yellow triangle RST with the larger piece and sew a 1/4" seam. Before pressing, place your ruler along your stitch line and cut off the extra fabric. Now set the seam and press to one side and your first block is finished!

Our second block this week is Block #91 - Strawberry Basket.
 Cut ten 1 1/2" x 1 1/2" yellow squares.
Cut eight 1 1/2" x 1 1/2" red squares.
Cut two 2 1/2" x 2 1/2" green squares.
Cut one 3" x 3" red square.
Cut one 3" x 3" brown square.
Cut four 1 1/2" x 2" red rectangles.
Cut one 2 7/8" x 2 7/8" green square and cut this on the diagonal.

Place the red and brown 3" squares RST and sew it into an HST. You will only need one of these. The other is extra that you may be able to use later. Take eight of the 1 1/2" yellow yellow squares and place them RST with the eight 1 1/2" red squares. Sew a 1/4" seam, set the seam and press to one side. Place the short side of the red rectangles RST with one of the remaining little yellow squares. Sew a 1/4" seam, set the seam and press to one side.

Sew each of the red/yellow pairs into a four patch. Place one of the remaining red rectangles RST with the yellow square, sew a 1/4" seam, set the seam and press to one side. Your red/yellow "L" shape needs to look like the pieces in the picture to the right.

Place the green triangle RST with the red/yellow "L" so that they look like the left. Sew a 1/4" seam just inside the long edge of the green triangle. Cut off the little red triangles, set the seam and press to one side.

Organize your pieces the way you want them to look.

Once again you have a standard nine patch to put together. Since we have done quite a few nine patches, I figure I shouldn't need to post the instructions for final construction. Just watch for neatly nesting seams.
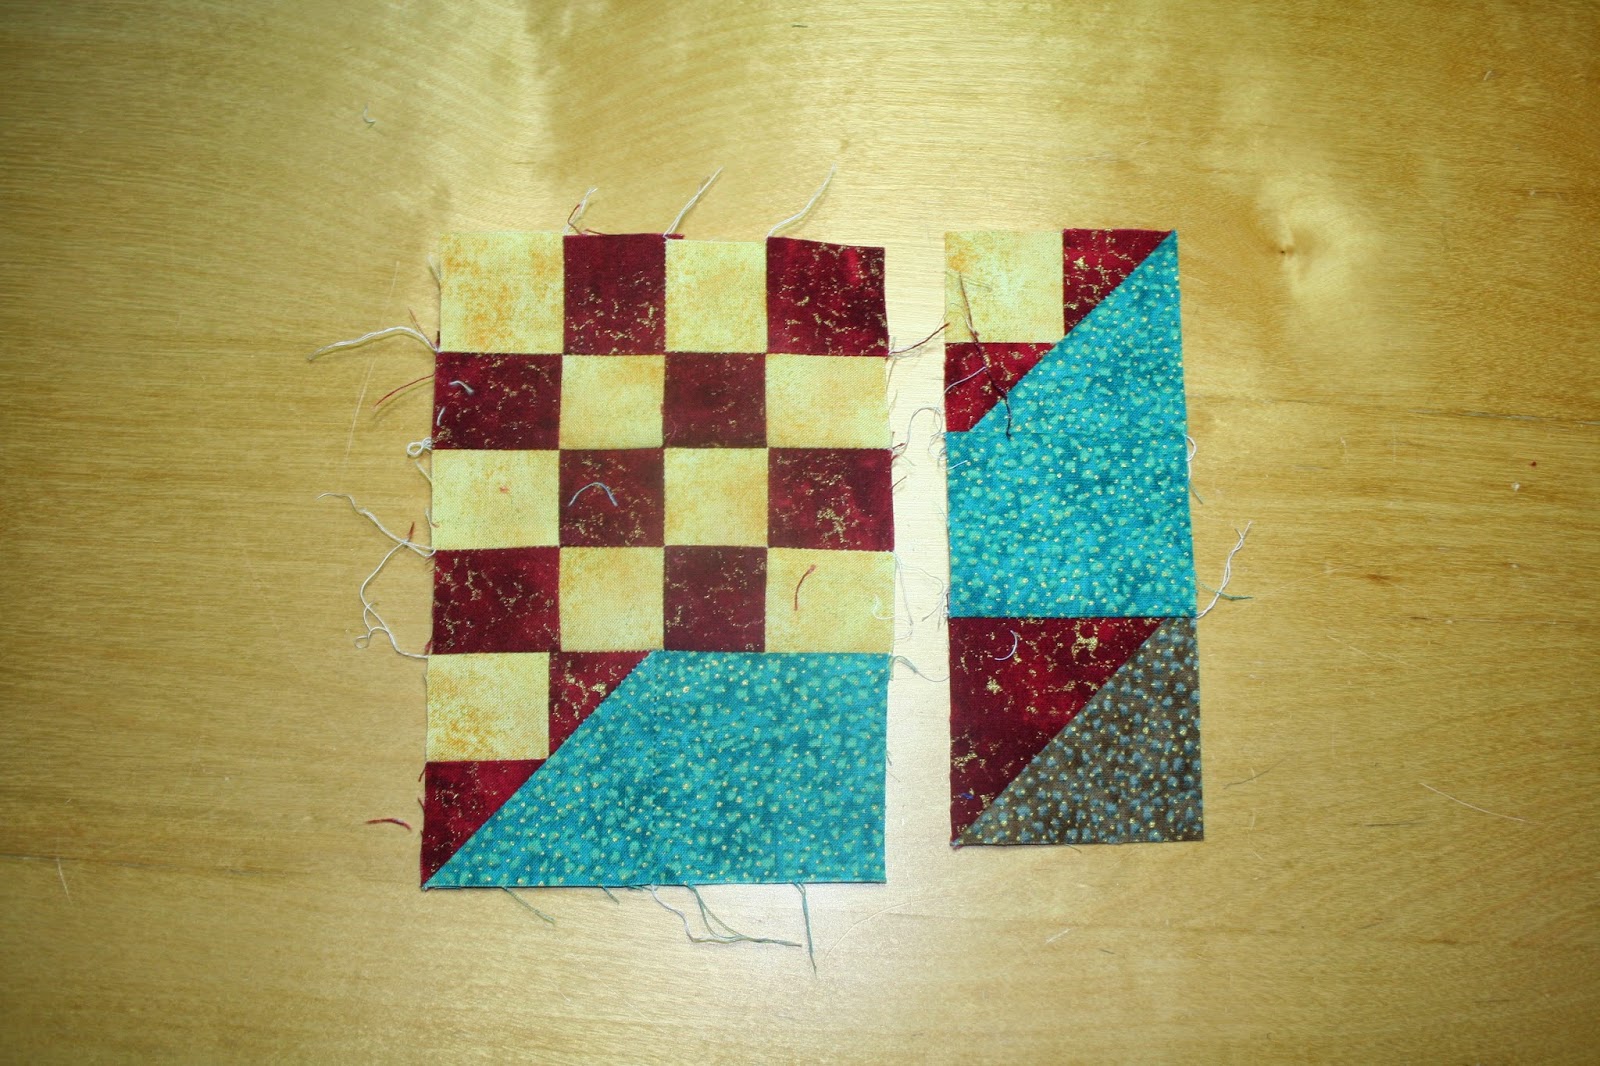
And our second block for this week is finished!

Our third block this week is Block #95 - Temperance Tree.
 Cut nine 2" x 2" light purple squares.
Cut nine 2" x 2" dark purple squares.
Cut two 1 1/2" x 1 1/2" blue squares.
Cut one 4 7/8" x 4 7/8" blue square.
Cut one 2 7/8" x 2 7/8" dark purple square, cut this on the diagonal.
Cut one 1 1/2" x 4" blue rectangle.

Place one light purple 2" square RST with one dark purple 2" square and make it into HSTs. Repeat for the other eight light purple/dark purple squares. Trim your HSTs to 1 1/2" square. Place the short side of the purple triangle RST with the blue rectangle, sew a 1/4" seam, set the seam and press to one side. Repeat with the other purple triangle on the other side of the blue rectangle.

Mark the centre of the large blue square. Place the edge of the blue purple piece RST diagonally along the centre of the large blue square. Sew a 1/4" seam and cut off the extra part of the blue square. Set the seam and press to one side. Trim the piece to 4 1/2" x 4 1/2" square.


Sew the pairs together into four patches.


Lastly, place the last long rectangle RST with the larger piece, sew a 1/4" seam, set the seam and press to one side. Our third, and final, block for this week is finished!

Hopefully next week goes a little more smoothly for me. I'm pretty sure that there aren't any PD days next week and I already have the math done for the pieces required for the next few blocks so with any luck I will be able to put together more than three blocks.
We don't seem to be starting things out any better though since I just got the news that the city I am in as well as the city Quinn is in is under a winter storm warning so at this point we don't know if he will be able to make it home tonight. With the storm, his flight may be cancelled. Now while I hope he can make it home, I fully admit that I prefer for him to come home later and safely rather than sooner and risk problems.
Have fun and we'll see you next week!
Tara


